A complete SalesForce app pipeline #1: Security and the the JWT flow
In this series I will show you how to set up a complete continues integration pipeline for Salesforce projects. In this particular solution, we will do the following steps:
- Authenticate our server to our DevHub as well as to any existing orgs
- Create scratch orgs, test integrity and run tests
- If everything is fine, push code into staging and packaging org
- When it’s needed, package the code
- If everything is fine, announce the new version on Slack / Github / etc…
We are using GitLab as our CI environment, but you can very easily transform these techniques to any other CI solution (Travis, CodeFresh, CodeShip….).
The Trailhead tutorial above is a very good introduction; but in my experience in order to make it really work in practice, you need better to understand some concepts — so I’m trying to explain them.
https://trailhead.salesforce.com/en/content/learn/projects/automate-cicd-with-gitlab
Authentication without passwords
The whole idea about CI is to kick off some automated jobs when some action happens. For example, when there is a new commit on git, the code is pushed to an org. This is done by a server, however, the server can not ‘login’ itself the traditional way. It is not supported to ‘save’ the passwords for the server and let it login itself (for a very good reason). However, there are other ways to authenticate.
We are using the JWT-based flow. You can think about this the following way: instead of passwords, you store signatures (called keys); and the org stores a signed document. When you want to login, you send your signature to the org. The org has your signed document, so it can verify, if the your signature is matching the document.

Create a certification
This document is called ‘certification’. Follow the steps about to make your own one. This is what is happening here:
- In the first 3 lines, you generate yourself a private key (server3.key) (some details: first, you make an encrypted key, then decrypt it, then delete the original, encrypted file)
- 4th line: generate a ‘certificate signing request’ (server3.csr)
- 5th line: you sign your own request, and generate a certification (server.crt). This is the document which you will upload to the org.
$ openssl genrsa -des3 -passout pass:myPassw0rd -out server3.pass.key 2048$ openssl rsa -passin pass:myPassw0rd -in server3.pass.key -out server3.key$ rm server3.pass.key$ openssl req -new -key server3.key -out server3.csr$ openssl x509 -req -sha256 -days 365 -in server3.csr -signkey server3.key -out server3.crt
Create a connected app
In order to authorize yourself to an org, you need to create a connected app in that org. Set all the parameters as you see in the screenshot. Don’t forget to set the OAuth scopes, and to upload your certificate file.

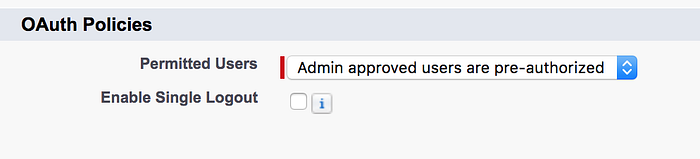
Save the app. After this, select Edit Policies, and set at the OAuth Policies ‘Permitted Users‘ to ‘Admin approved users are pre-authorized’. This means that even though a user has the certificate, she also needs to have a permission from the Admin to use it.
In order to give permission, navigate to the Profile section of the Connected App settings, and add some profiles (or you can do the same with permission sets).

Let’s connect!
All security settings are done on the salesforce side; so let’s connect! I assume that you already have SFDX on your computer — if not, please see the trailhead module above.
There is one more thing needed from the org: the Connected App’s consumer key. You can get it from the API section of the app’s page. This is needed to identify your org in our case (because this org has the certifications).

So, let’s connect! The parameters:
- — clientid : the consumer key
- — jwtkeyfile : this is the file with your signature. It is crucial to keep this file in a secure place! Note that you don’t use the certificate, just the signature itself — so the certification itself is ‘safe’, because it’s not going through the network.
- — username : the username of the logged in user
- -a : an alias for the connected org
sfdx force:auth:jwt:grant --clientid <CONSUMER_KEY> --jwtkeyfile server3.key --username <USER_NAME> -a myConnectedOrgIf everything goes well, you get a message: Successfully authorized
You can also check if your org connected using this command:
sfdx force:org:listWhat we have achieved
Now we can create a fully automated authorization flow to any salesforce org. This is huge, because now we can write scripts on remote servers, and these scripts can do whatever we want in our orgs — without any human interaction! And at the same time, the authorization is secure.
In the next part, we will see, what we can do with with this!
p.s.
You may ask, why it is better to send a key through the network than to send a password. Well, it was a simplification. You are not really sending your key, you are sending a request signed with your key. Details here.